BENJAMIN MARAUDER 5.5 - By Artilheiro translated
primeiro, Artilheiro se não tiveres de acordo com algo que escrevi ou com tudo diz que apago.
Ok, since a lot of people don't know Portuguese, i decided to translate the review of our friend Artilheiro.
So here we go:
hope you enjoyed this, this give me some work
regards
good shooting for all
Ok, since a lot of people don't know Portuguese, i decided to translate the review of our friend Artilheiro.
So here we go:
Artilheiro wrote:About 4 months after my .22 Marauder arrived, and after many tests and tweaks. I think i managed to gather a good quantity of data and info to do this review.
Specs
Benjamin Marauder was developod by Crosman that provided a gun full of resources and tweak options until now avaiable only on High-End airguns. "She" has a Crosman rifled and cocked barrel (like BSA Super Ten) and on my specific gun, when i took the barrel band oring it became a full floating barrel that gave me a nice accuracy increase! So if it was already good, just made it better. Besides all this it is a Shrouded Barrel that makes this gun very quiet. The Mrod has a variable working pressure between 1700PSI (120BAR) to 3000PSI (206BAR). Because of this resource it can be feeded with either HPA or CO2. She can be charged via Handpump or a Scuba Bottle. This is a good feature to the ones who practice aoutdoor shooting.
Manufacture Specs
Noise: about 85dB.(low-medium).
Barrel Length: 20" (508mm)
overall legth: 43" (1092mm)
Magazine Capacity (clip): 10 pellets
Barrel: rifled and chocked
Open Sights: NA.
Scope Mount: dovetail 11mm.
Weight: 7.5 lbs (3,4kg)
Trigger: 2 stage adjustable
Trigger weight: about 1,5 lbs (680g)
Butt Pad: original, ventilated. Mine has an adjustable one.
Fuel: PCP(Pre-Charged Pneumatic) or CO2
Safety: Manual (lever in front of the trigger)
Visual: Rifle.
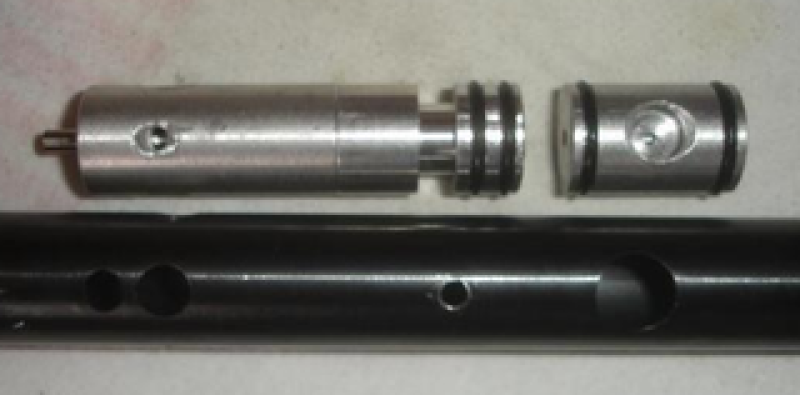
Taking Marauder apart.
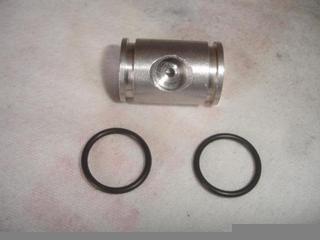
Valve and Gauge Suport.
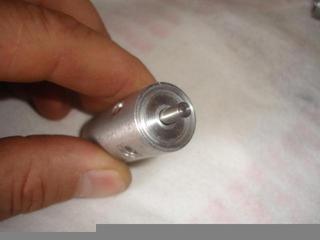
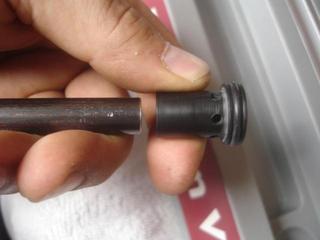
Valve.
Rear of the valve.
Valve Pin (where striker hits to open valve, don't really know you do you call it
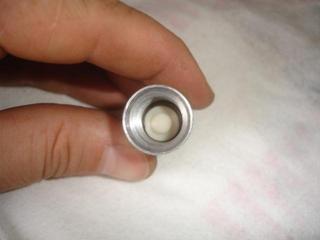
Valve inside.
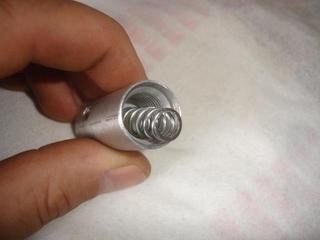
Valve spring
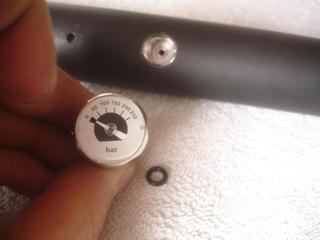
Gauge suport.
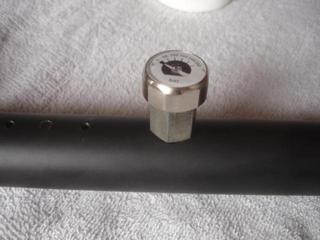
Mounted Gauge suport and Gauge.
Gauge mounted on the tube.
internal view of the striker (hammer).
Mounting the striker on the tube.
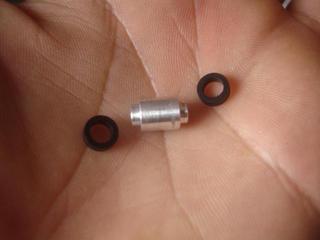
Transferport.
Installed Transferport.
Installing Bolt on the tube.
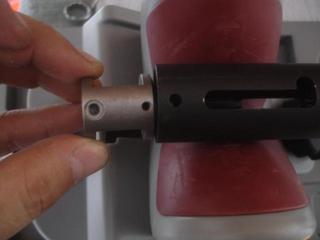
Piece to align barrel on the shroud.
Disassembling charge connector.
TRIGGER
As we can see on the pictures, all trigger parts are metalic. It has very adjustable tweaks such as:
- Trigger weight(A),
- 1st Stage(B)
- 2nd stage(C).
- Trigger position (D).
If this te«weaks aren't enought, to set this trigger very light, i took off the spring as is showned on the pictures. When i took this spring off, the trigger weight reduced more then 40%!
MAGAZINE (Clip)
As everything on Marauder is simple so is the clip. There's no lever neither locks, it has a central string inside (see the picture) that makes the wheel (where the ammo is) rotate, so, when we pull the bolt it automaticly rotate and bring a pellet to the inlead position, when we push the bolt we also push the pellet to the inlead of the barrel and it's done, pellet on the barrel ready to shoot. To fill the mag with pellets, just need to rotate clockwise the transparent plastic display numbered from 1 to 10 until it locks. Then we insert the first pellet and we start rotating the same piece this time anti-clockwise and we put a pellet on each slot until we get to the place we start. When it clicks we're done to put it on the chamber by the right side of the gun. One detail: after the 10th shot when we pull the bolt we will not be able to push it back this means we're out of shots so we take the mag of and either put another mag or refill this one and insert it back, after inserted we just need to push the bolt and we are ready to shoot again.
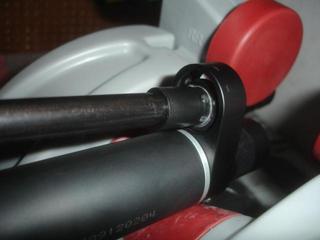
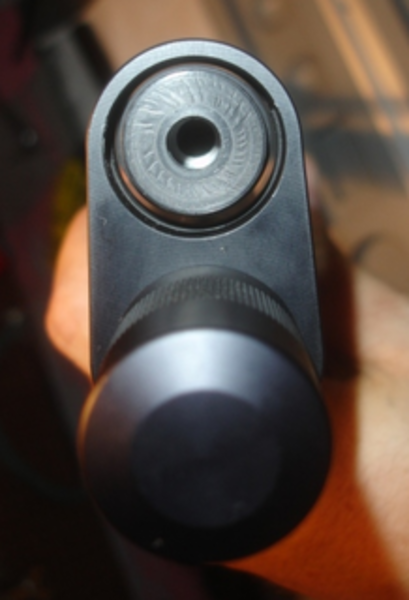
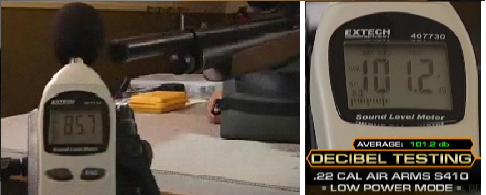
Shroud
One more hot feature of the Marauder. The 4 chamber system works so good that sometimes we only ear the metallic sound of the striker hitting the valve! The test made by Paul Capello had a result just a little over 85dB, the same test done on an AA S410 Extra FAc in low power mode resulted on 101.2dB.
Stock
Made of Beech, it's a very well finished piece, light and ambidextrous. On mine, I removed the original butt pad and putted an adjustable one, this resulted on a much comfortable and firm stock when aiming. The action is attached to the stock by a single screw this definitely makes things very easy when unmounting for maintenance, cleaning or tweaking.
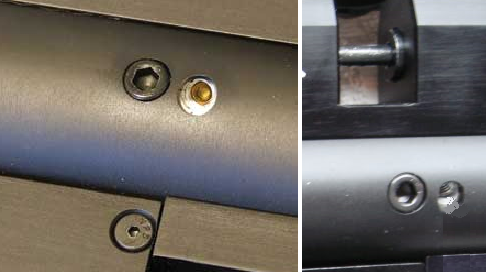
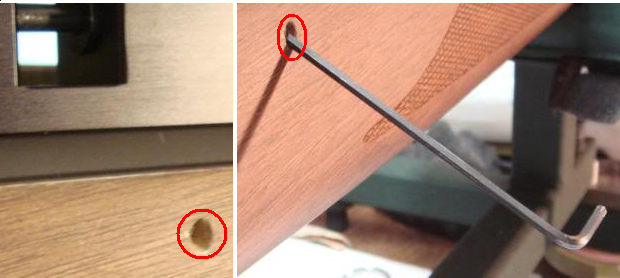
Setting the fill pressure
The Mrod was projected to work on a pressure band from 1700 to 3000PSI. This is done by adjusting the tension of the hammer spring and the travel length of the hammer through a central screw. We can access both the screw and the spring introducing an Allen screw driver of 1/4 (spring) or 1/8 (srew) on the srew hole in the end of the tube (right bellow the bolt). On my gun I took advantage of the screw in the hole and screwed a screw here now it looks better (Artilheiro only did dis because of the looking, but this hole should be always closed to prevent dust and stuff from entering the hammer chamber). One of the secrets on the marauder is find the right equilibrium point between these tweaks! From these two tweaks will vary both the air wasted per shot and the pellet velocity.
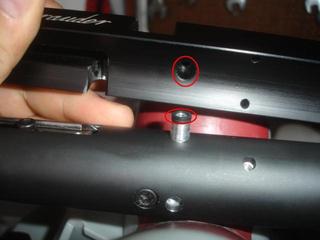
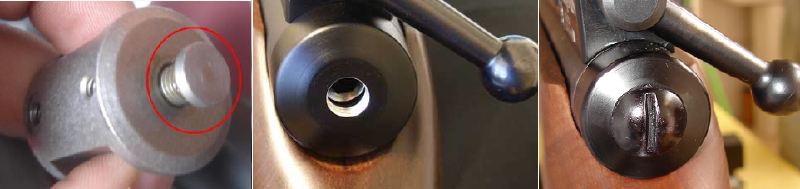
Velocity Fine Tuning
This fine tune is made from a precise procedure so we can have the velocity we want inside the gun limits of course. To do this tune we have to take the stock off. The tune is done on a screw that is located on the valve body. As we screw in (clockwise) lower the velocity (by screwing in we're closing the air passage on the transferport), if we screw out (anti-clockwise) higher velocity (by doing this more air pass through the transferport). This tune is very sensitive, 1/4 of a turn do a big difference on the velocity. To access the screw you need a 3/16 Allen screw driver and remove the lock screw first (photo 1). After remove that screw, with the same Allen key we can do the tune itself (photo 2). After you are satisfied with the tune don't forget put the locking screw back. After this tune you'll notice that the velocity will be almost constant.
_photo1_____________________________photo 2
It's possible to drill an hole on the stock so we don't need to remove the stock to do this tune (thanks to Supercharger i think) but you may not like the look of that.
Another way to lower the velocity is replacing the transferport by another with a smaller hole, this is one of the next tunes i intend to do. It's my intention to get 885-900 fps (270-275m/s) with 15gr pellets from a 1600PSI pressure.
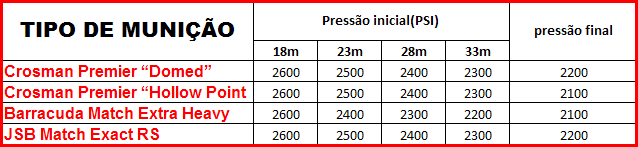
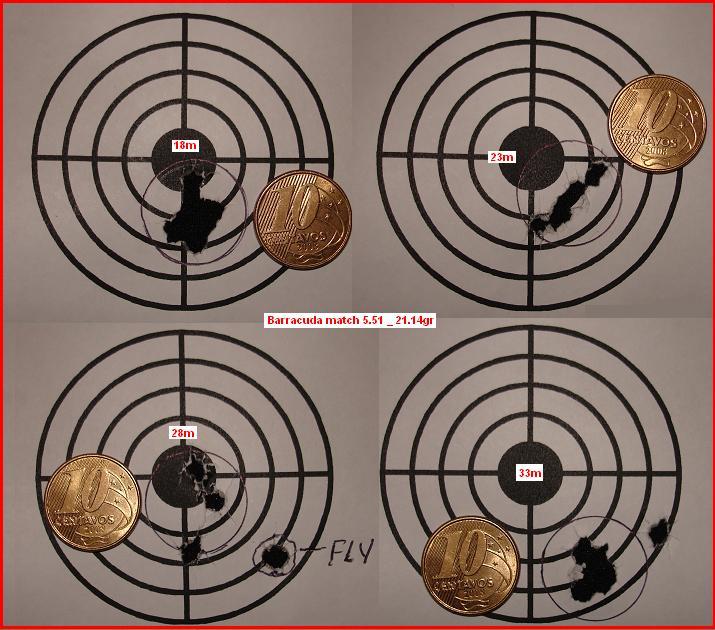
Groups
All this tests were made with a 2600PSI (180bar) initial fill pressure. These groups were made at 20, 25, 31 and 36yd (18, 23, 28 e 33m). The same distances of 1/5 metallic target matches here in Rio. AS in the matches there are 5 target per distance i made 5 shots per different pellet type at each distance (don't know if i'm being very clear here because my english kind of sucks... anyway move on). To each distance i reset the pressure to 2600PSI, this way we can see the different performance of each pellet on my Marauder and which one is the best on my gun. After i tested very types of pellets theses were the best results:
Crosman Premier “Domed”
Crosman Premier “Hollow Point
Barracuda Match Extra Heavy
JSB Match Exact RS
So with all this data we can conclude that for my Mrod, at 20yd the best is Barracuda, 25yd CP Domed, 31 and 36yd the CP HP
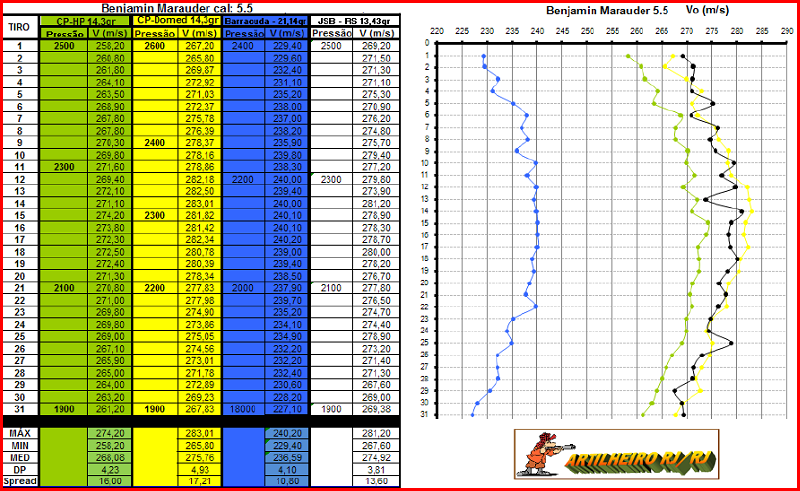
Velocity
With the previous pellets were made velocity tests and these are the results:
Well, in first place these are the results taht i wanted to share with you guys. As i said previously, the MRod is a gun that offers a big diversity of tweaks and tunes, so as i'm changing my tunes i'll share the new results. Last week i received the 24" LW Barrel, because of his length i'll have to resize the shroud (crosman barrel only has 20"). I'm already working on a new transfer port too.


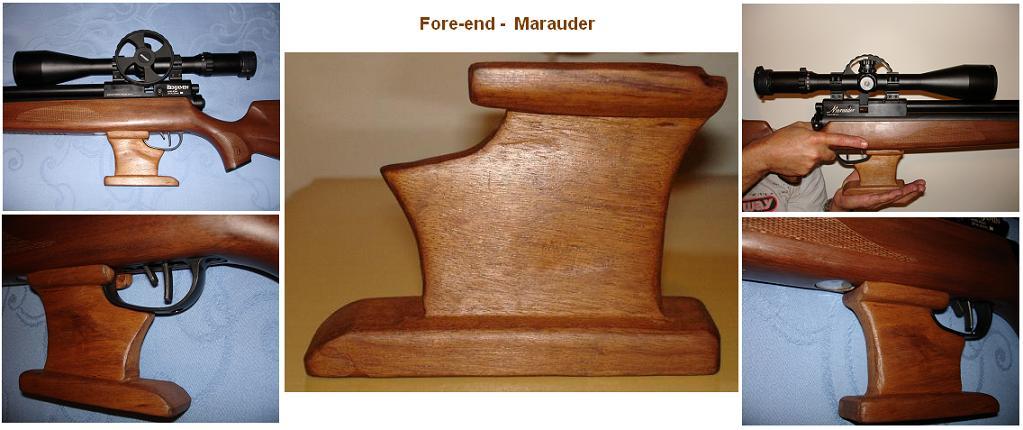
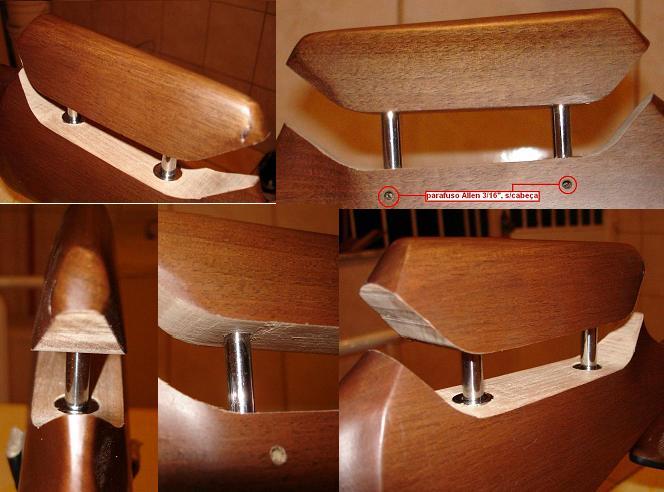
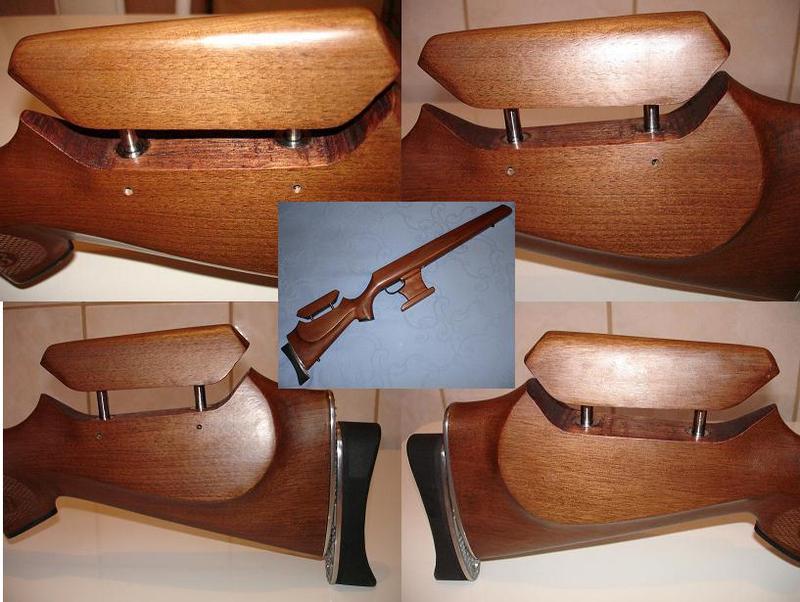
Artilheiro wrote:Recently i made in Imbúia(wood type) a fore-end (i know them as hamsters). This accessory improved the aiming.
hope you enjoyed this, this give me some work
regards
good shooting for all